A couple weeks ago
I showed you some pictures of boxes I made using old floppy disks,

and I had promised to come back to it.
Well, this is it.
I'm sorry it took me a little longer then I thought,
but I had to make sure I had all the right pics sequence to show you how to.
I got this idea when I saw a project made with 5 floppy disks to form like an open cube to use as a pencil container.
Each floppy disk had 4 holes drilled on to tie them together using some sort of electrical wire.
So, I thought instead of drilling holes I'm going to use felt to make pouches for the floppy disks and then I'll sew the pouches together.
And that was treasure box #1.

I add a lid and was quite happy with the result
(don't make the lid and you'll have the open cube/pencil container).

Afterwards,
I start thinking, I could make a different one, as an hexagon, and I could use fabric instead of felt.

And that was treasure box #2.
I really like it.
I made the pouches out of coordinating fabrics
and inserted a square of batting in each.
And then I decided I would make another one out of felt,
and take pics for a tute. 

Cute, isn't it?
OK, for the tute, here we go.
You'll need:
- 6 old floppy disks


- 6 felt squares for the outside (just a little bit bigger than the floppy disk, mines were 4,5")
- 6 felt squares for the inside (4,5")


- 2 felt hexagons for the outside (side length=4,5" on mines)
- 2 felt hexagons for the inside (same length, 4,5")


- 2 cardboard hexagons (smaller size: side length=4")

- felt for embellishments
- felting mat
- felting tool
- glue
- gallon/ribbon/rhinestones...
Start by choosing your inside and outside felt colours.
Cut six 4,5"squares from each color (12 total).
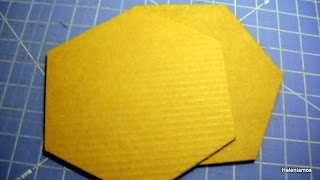
Cut two hexagons 4,5" side length from each color (4 total).
If you going to embellish yours like I did,
cut 1 big flower on felt for the lid,
like so,

and six smaller ones, like so.

Then you have to felt the flower parts together to make a whole flower.

When all the flowers are felted together,

you have to felt them on the outside squares and on the outside lid.

Now that all the squares and the lid have the flowers felted on,

it's time to start sewing together the squares
and inserting the floppy disk on the pouches.
Using the embroidery floss on a coordinate color and a blanket stitch,
sew together the outside and inside felt squares.
When you have 3 sides sewn together,

insert the disk in and sew close the last side.
Do the same with the bottom and the lid,
except for those you'll insert the hexagon cardboard
between the felt hexagons.

When everything is sewn together,

it's time to start forming the box,
that is, sewing all the sides together.
Start by sewing one side of each square to one side of the hexagon bottom,

like this.
When it's done,

it will look like this.
Then start sewing one square side to the next square, like so.

And you're almost done!

The last thing to do is to sew the lid to the box:

sew one side of the hexagon lid to one side of the hexagon box.
Embellish it as you will, and you're done!

You have a cute treasure box for all your treasured keepsakes!
Enjoy!
What a great idea!
ReplyDeleteThats really clever, thanks for sharing
ReplyDeleteWe moved in December, and I found a bunch of these and threw them away! Ah, if I'd only seen your beautiful ides first!
ReplyDeleteLindo e obrigado por compartilhar
ReplyDeleteBeijos
Margaret
Buen tutorial y precioso trabajo.
ReplyDeleteSaludos.
loved it!!! :)
ReplyDeleteOMG! who on earth would have thought to create such wonders using floppy disks.... :O Brilliant... :D
ReplyDeleteWhat a clever idea. Thanks for the great tutorial.
ReplyDelete