Wednesday, May 12, 2010

Floppy Disk Treasure Box Tutorial


A couple weeks ago
I showed you some pictures of boxes I made using old floppy disks,
and I had promised to come back to it.
Well, this is it.
I'm sorry it took me a little longer then I thought,
but I had to make sure I had all the right pics sequence to show you how to.
I got this idea when I saw a project made with 5 floppy disks to form like an open cube to use as a pencil container.
Each floppy disk had 4 holes drilled on to tie them together using some sort of electrical wire.
So,  I thought instead of drilling holes I'm going to use felt to make pouches for the floppy disks and then I'll sew the pouches together.
And that was treasure box #1.
I add a lid and was quite happy with the result
(don't make the lid and you'll have the open cube/pencil container).
Afterwards,
 I start thinking, I could make a different one, as an hexagon, and I could use fabric instead of felt. 
And that was treasure box #2.
I really like it.
I made the pouches out of coordinating fabrics
and inserted a square of batting in each.

And then I decided I would make another one out of felt,

and take pics for a tute.
Cute, isn't it?

OK, for the tute, here we go.
You'll need:
  • 6 old floppy disks
  • 6 felt squares for the outside (just a little bit bigger than the floppy disk, mines were 4,5")
  • 6 felt squares for the inside (4,5")
  • 2 felt hexagons for the outside (side length=4,5" on mines)
  • 2 felt hexagons for the inside (same length, 4,5")
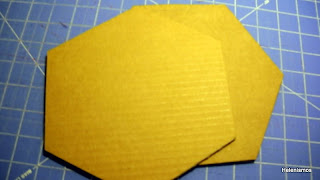
  • 2 cardboard hexagons (smaller size: side length=4")
  • felt for embellishments
  • felting mat
  • felting tool
  • glue
  • gallon/ribbon/rhinestones...
Start by choosing your inside and outside felt colours.
Cut six 4,5"squares from each color (12 total).
Cut two hexagons 4,5" side length from each color (4 total).
If you going to embellish yours like I did,
cut 1 big flower on felt for the lid,
like so, 
and six smaller ones, like so.
 Then you have to felt the flower parts together to make a whole flower.
When all the flowers are felted together,
 
you have to felt them on the outside squares and on the outside lid.
 
Now that all the squares and the lid have the flowers felted on,
 
it's time to start sewing together the squares
and inserting the floppy disk on the pouches.
Using the embroidery floss on a coordinate color and a blanket stitch,
sew together the outside and inside felt squares.
When you have 3 sides sewn together,
 
insert the disk in and sew close the last side.
Do the same with the bottom and the lid,
except for those you'll insert the hexagon cardboard
between the felt hexagons.
When everything is sewn together,

it's time to start forming the box,
that is, sewing all the sides together.
Start by sewing one side of each square to one side of the hexagon bottom,

like this.
When it's done,
it will look like this.

Then start sewing one square side to the next square, like so. 
 
And you're almost done!
The last thing to do is to sew the lid to the box:
sew one side of the hexagon lid to one side of the hexagon box.

 Embellish it as you will, and you're done!  
You have a cute treasure box for all your treasured keepsakes!
Enjoy!

Tuesday, May 11, 2010

Carrott Cake Roll

Sunday morning I was just feeling like something sweet... 
It was Mother's Day
and as with every other holiday I was a bit nostalgic,
thus the cravings and the sweet tooth.
So, into the kitchen I went
and after checking the fridge and the supplies
(I'm getting dangerously low in everything,
which means it's time to go to the grocery store again...),
I decided I would go for the carrot cake roll I used to make years ago.
For the ingredients, you'll need:
  • Carrots - 1 pound
  • Sugar - 2 cups
  • Eggs - 4
  • Flour (self rising) - 4 Tablespoons
  • Orange - 1 (juice & zest)
  • Cinnamon and sugar as needed
Start by cooking the carrots.
When done, drain the water and smash the carrots.
Add the sugar and the eggs to the smashed carrots
and beat well with the mixer (or by hand).
Add the orange juice, the orange zest and the flour.
Beat again till everything is well mixed.
Cover a shallow pan (I used a cookie sheet)
with parchment paper and grease it.
Pour the mix into the pan and put it in the oven
(preheated at 375 F)
for about 25 minutes (the toothpick should come out still a little bit wet).
Flip the cake on a dish towel sprinkled with sugar.
Sprinkle some cinnamon on top
(that's what I used, but you could use some jelly or jam fruit as well),
and roll the cake with the dish towel help.
Et voila!
Very tasty and easy to bake.
The girls came by for Mother's Day wishes
and the cake was gone in minutes!

Enjoy!

PS - if you liked this recipe
don't forget you can view it again in here,
as well as hundreds of other recipes, and read my dear daughter-in-law blog, as the web editor for the English language of the http://www.madeinkitchen.tv/blog/en/.

Sunday, May 9, 2010

Happy Mother's Day!l


A rose from my garden to you all...
and wishes for a
Happy Mother's Day!

Saturday, May 8, 2010

Strip Quilting inside my Garden

Saturday is here and the week is gone.
Behind it... the severe weather... and lots of destruction, pain and suffering for so many folks so close by.
All across the state, specially in middle Tennessee, the flooding brought bad memories to us all of Katrina.
I can hardly imagine what those poor people are going trough...
People died and so many lost everything.
My European background makes it difficult to accept
that we are in fact at Nature's mercy.
More than a state of mind it's a state of the heart if I can say so...
whatever will be...will be.
There's no way to prevent it from happening.
Here in East Tennessee things were much much lighter...
We got some rain, some HOT temperatures...
some moderate wind... a few branches down...
and that was it.
Today we're cooler and we have sunshine.
It looks and feels nice.
So... walk with me,
let me take you inside my garden,
and you'll see why I spend so much time taking care of it.

It is indeed my little piece of heaven.
Am I right...?...

J loved it, and I'm very proud of myself.
It's very relaxing just to sit on a bench and listen... nothing but the birds... the hawk calls... and the cat that wants to be pet and jumps on my lap... When I was quitting (smoking) a year ago I would just sit on the bench,
close my eyes
and there I would go...
nowhere but wherever I would want to!
Sometimes,
I bring some flowers in the house for J.
The peonies are really gorgeous this year.

Inside and besides my everyday routines,
I made some place mats.
Remember the strip quilting
I've shown you in here?
Well...
I've used some of the blocks to make some place mats.
You can see them in more detail bellow.

With the rest of the blocks
I made a small quilt
and used it as a sort of table runner on the armoire in our bedroom.
I really enjoy this technique
and I suspect I'll be making a lot more with it in the future.

Saturday, May 1, 2010

Shrimp Turnovers, aka Rissois de Camarao

It has been quite a week, weather related that is!
From severe weather warnings last weekend,
to rain and hail earlier in the week,
to beautiful spring time sun and temperatures like,
to another very severe weather and tornado warnings for this weekend!
Ain't that something?!..lol...
J used to say...
"Here in Tennessee you'll get all four seasons in the very same day!"
And he was very much right!
So...
... the week has passed,
and like I said, we had hail,
we had rain and we had sunshine...
And on my great outdoors (lol...)
I mowed, worked on the gardens
(the irises look awesome, don't you think...?),
I still have lots left to bloom...
J always loved irises, the TN state flower:
 The iris (Genus Iridaceae) was designated as the state cultivated flower by the Legislature in 1933. While there are several different colors among the iris, the purple iris is commonly accepted as the state flower.@50states.com,
and I make it a matter of honour
to have lots and lots of iris blooms every spring!

Inside things have been busy too... I've finished same projects...

What do you think...?, they look good don't they?,
I'll tell you about them later on in another post,
but I'll tell you one thing right now: both of these projects are related to...
YES!.... a floppy disc!...
LOL... you'll have to wait to learn about it!

Anyways...
I've also cooked a bit, and today's post it's really about it:
a recipe
from my dear Mother's old cook book...
And yes, it's in Portuguese, and a very precious thing to me.
My mom had it filled with handwritten recipes
she would see on TV or hear on the radio,
Christmas and Birthday Cards,
and other stuff she would like
she would just keep it between the book pages...

Translating the title,
it would read "The Master Chef - a Complete Culinary Essay:
Portuguese Regional Cuisine and French Cuisine".
And as an Introduction,
in the very first page... (this is very precious)...
...very vintage like...
 ... it reads:
"Dear Madam: this is a very, very useful book for all housewives..."
and goes on and on, giving the best kind of etiquette advices,
how to set a table, how to organize a menu, and so on and so on...
I love it!
And I just love to open the pages
and find all those little treasures my Mon kept safe inside of the book...
this next one is one of her handwritten recipes...
I've always loved my Mom's handwriting...
OK... to the recipe now...
I guess I was missing my Mom, and her cooking,
and it came to my mind the Shrimp Turnovers
(that's the best translation I can find for Rissois de Camarao) 
she used to make
and they were soo... GOOD!
I might as well tell you right now that mine didn't come out even close to my memories...
don't get me wrong, they were good, just not as good as my Mom's!

OK... here we go... For the ingredients, you'll need:
For the dough:
  • 1 cup water
  • 1 cup flour
  • 1 tablespoon butter
  • pinch of salt
For the filling:
  • 1 tablespoon flour
  • 1/2 cup milk
  • 1 tablespoon butter
  • salt & pepper to taste
  • lemon juice
  • 1 cup previously cooked small shrimp
To bread the Shrimp Turnovers:
  • 1 egg, beaten
  • 1 cup bread crumbs
  • vegetable oil to fry

In a medium sauce pan, bring the water, salt and butter to a boil.
Slowly stir in the flour and keep stirring till it forms a ball
(the walls of the pan will get a little crusty).
Remove from heat and keep stirring a little bit more. Let it cool.
 
In another sauce pan whisk together: flour, milk, butter, salt & pepper.
Let it simmer, always stirring, till it thickens.
Correct the seasoning if needed, add a little bit of lemon juice, and add the previously cooked shrimp (if big shrimp, just cut it down in smaller pieces).
Now, start by rolling the dough,
thin but not very thin (so it won't break when folded).
Using a glass or a biscuit cutter,
 
cut circles on the dough.
Fill each circle with 1 teaspoon filling:
Fold in half and press the borders with your fingertips.

Coat it with the egg and then with the bread crumbs.

 
Freeze it if you want to,

or fry it right away, for about 1 or 2 minutes each side, till golden brown.
They are GOOD!

Enjoy!